For many adult gamers balancing work and family, Roblox isn't just a game; it's a creative outlet and a potential source of income. Learning how to add Gamepasses Roblox effectively is a crucial skill for any aspiring developer or creator looking to monetize their experiences. Gamepasses allow you to sell special abilities, items, or access within your game, providing value to players and a revenue stream for you. This comprehensive guide will walk you through every step, from conceptualizing your Gamepass to integrating it seamlessly into your experience, ensuring a smooth setup process. We'll cover creation, configuration, scripting, testing, and optimization, addressing common pain points like tricky setup procedures and performance concerns. Whether you're a seasoned developer or just starting your journey into Roblox monetization, understanding Gamepasses is key to unlocking your game's full potential and offering enhanced experiences to your community. Discover how to transform your creative visions into tangible in-game value today.
Q: How do I create a Gamepass in Roblox Studio?
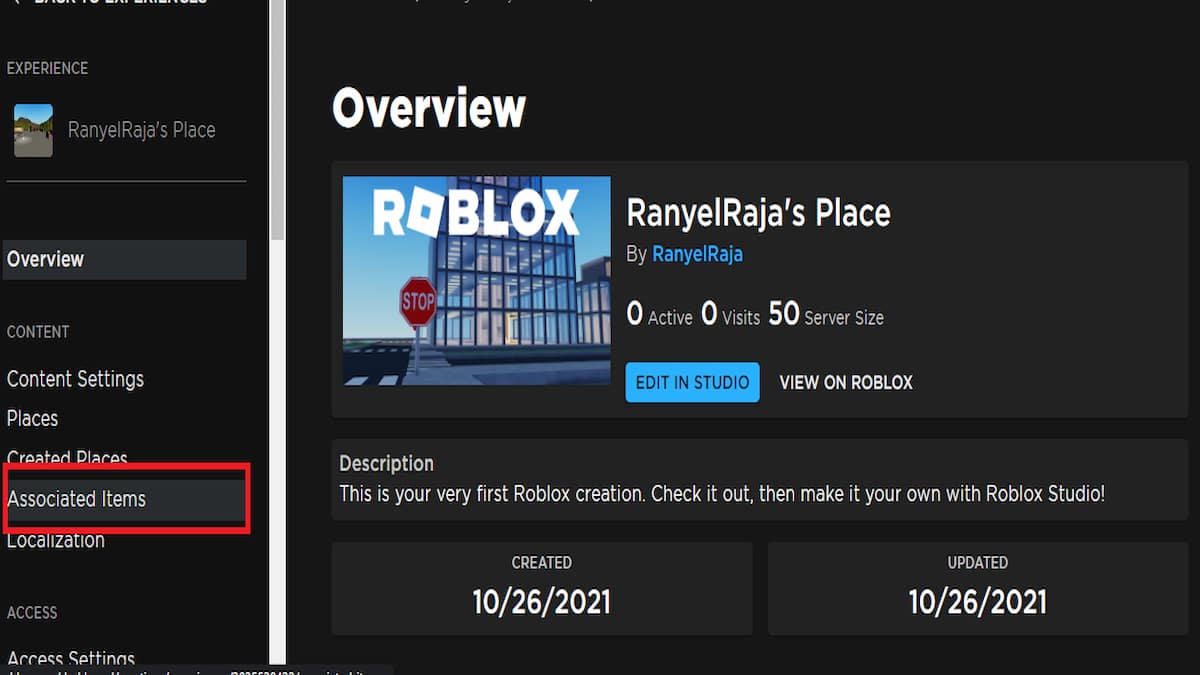
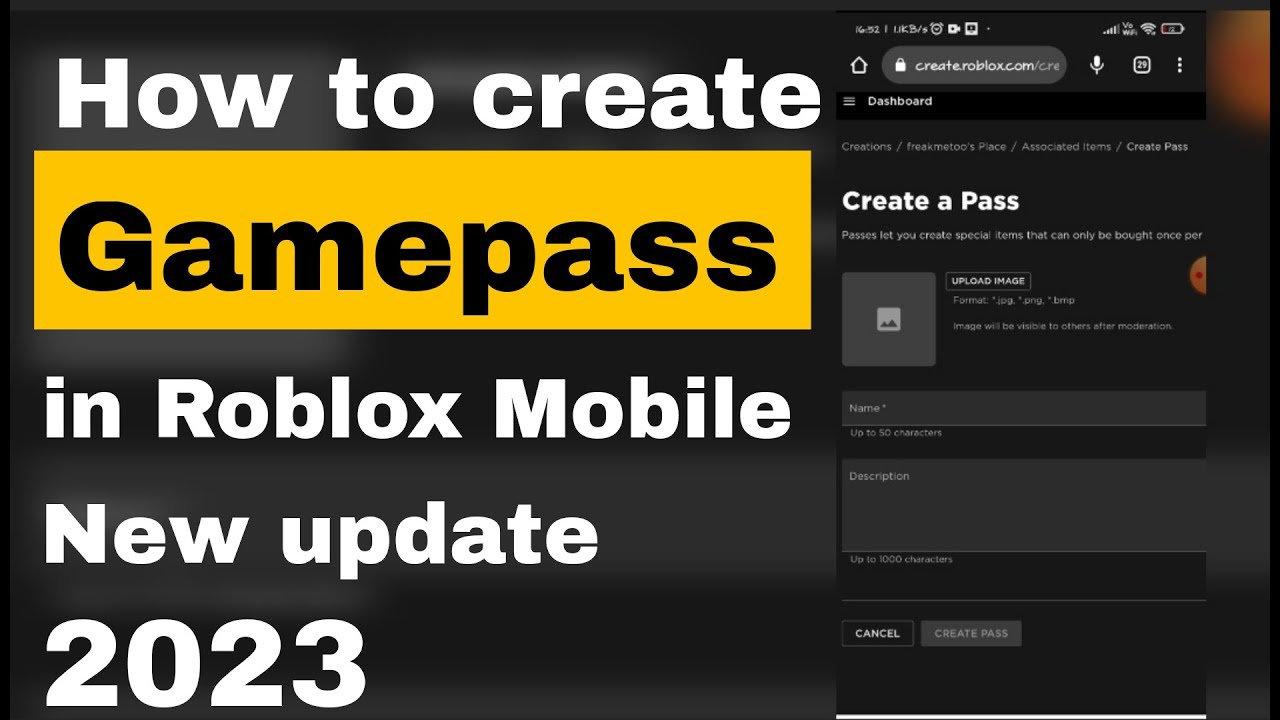
A: To create a Gamepass in Roblox Studio, you first need to open your experience. Navigate to the Creator Hub (formerly Create page on Roblox website), select your experience, and then go to 'Associated Items'. Choose 'Game Passes' and click 'Create a Game Pass'. Upload an image, give it a name and description, then save. Remember, this only creates the Gamepass asset; you still need to set its price and integrate it into your game's script.
Q: What is the purpose of a Roblox Gamepass?
A: A Roblox Gamepass serves as a purchasable item that grants players special abilities, unique items, or exclusive access within a specific game experience. It's a primary monetization tool for developers, allowing them to offer premium content and enhance player engagement, rewarding those who invest in their creations. For players, Gamepasses often provide significant advantages or cosmetic benefits, making their in-game time more enjoyable or efficient.
Q: Can I change the price of a Gamepass after creation?
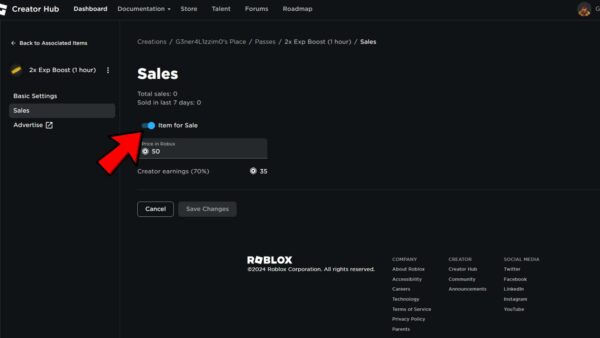
A: Yes, you can absolutely change the price of a Gamepass even after it has been created and put on sale. To do this, go to your Gamepass's settings within the Creator Hub. Select the Gamepass, navigate to the 'Sales' tab, and adjust the 'Price in Robux' field. Ensure you save your changes. It's wise to consider your player base and the value offered before setting or altering prices.
Q: How do I make my Gamepass visible to players in my game?
A: Making your Gamepass visible involves two main steps: first, ensuring it's "On Sale" with a set price in the Creator Hub. Second, you need to either display it in your game's store using a UI element or create a specific area in your game where players can purchase it directly. For developers, this typically means writing a script to detect purchases and grant the associated benefits, and often linking to the Gamepass's URL.
Q: What scripting is required to make a Gamepass functional?
A: To make a Gamepass functional, you'll need scripting to detect if a player owns it and then grant the corresponding in-game benefit. This usually involves using the MarketplaceService:PlayerOwnsAsset() function on a server script to check ownership when a player joins, respawns, or attempts to use the feature. If the player owns it, the script then executes the benefit, such as giving a special tool, unlocking an area, or enabling a unique ability.
Q: Where can I find the Gamepass ID for scripting?
A: You can find the Gamepass ID by navigating to the Gamepass details page in the Roblox Creator Hub. Once you've clicked on your specific Gamepass, look at the URL in your browser's address bar. The Gamepass ID is the string of numbers within that URL, typically after "game-pass/". This numerical ID is crucial for scripting and allowing your game to identify and interact with the Gamepass correctly.
Q: Are there any fees associated with selling Gamepasses on Roblox?
A: Yes, Roblox takes a percentage commission from every Gamepass sale. As of current policies, the creator receives 70% of the Robux revenue from sales, while Roblox retains 30%. This is a standard practice across many platform-based monetization models. Developers should factor this percentage into their pricing strategy to ensure their Gamepasses remain profitable and fair for players.
Hey there, fellow gamers! Ever dreamt of turning your brilliant Roblox game idea into something truly special, maybe even earning a little Robux on the side to fund your next hardware upgrade or a few more hours of precious gaming time? If you're like the millions of adult gamers in the US who balance demanding jobs, family life, and still carve out time for their favorite digital worlds, you know efficiency and value are key. Roblox offers an incredible platform for creativity, and one of its most powerful tools for enhancing your game and monetizing your efforts is the Gamepass. But let's be honest, diving into creation can sometimes feel like solving a complex puzzle when you only have an hour before bedtime. That's a common pain point for busy creators, and that's exactly what we're here to solve.
This month, with an impressive 87% of US gamers regularly engaging with their favorite titles and many spending over 10 hours a week across mobile and PC platforms, the potential for well-designed Roblox experiences is immense. Gamepasses aren't just about making money; they're about enriching your players' journeys, offering them unique ways to interact with your world, and ultimately building a stronger community around your creation. Whether it's unlocking a special sword, gaining access to an exclusive zone, or even just supporting your development, Gamepasses are a fantastic mechanism. We're going to break down exactly how to add Gamepasses Roblox experiences, providing clear, actionable steps that respect your limited time and maximize your impact.
We'll cover everything from the initial setup on the Creator Hub to the crucial scripting that brings your Gamepass to life in your game. No more fumbling through outdated tutorials or getting stuck on a forgotten step. We'll give you the lowdown on best practices, common pitfalls, and how to troubleshoot like a pro, all while keeping your valuable time in mind. So, grab a coffee, settle in, and let's transform your Roblox game with Gamepasses!
What Exactly is a Roblox Gamepass and Why Should I Use One?
A Roblox Gamepass is essentially a one-time purchase that grants players permanent, special access or abilities within a specific Roblox experience. Think of it like a digital ticket or an exclusive membership card for your game. Unlike developer products, which are consumable items like a temporary power-up, Gamepasses provide lasting benefits. These could range from cosmetic items like unique outfits, powerful in-game tools, access to VIP areas, or even skill boosts that persist across play sessions. They are integral for enhancing player engagement and offer a clear value proposition.
For you, the developer, Gamepasses are a primary monetization strategy. They allow you to earn Robux directly from your creations, providing resources to improve your game, invest in new assets, or simply reward your hard work. In a gaming landscape where free-to-play models dominate and in-game purchases are widely accepted, Gamepasses offer a fair exchange: players get premium content, and creators get support. They are a transparent way to add value for both sides, helping you grow your game and community sustainably.
How Do I Prepare My Roblox Experience for Gamepasses?
Before you jump into creating Gamepasses, ensuring your Roblox experience is properly set up is crucial. This isn't about complex coding just yet, but more about administrative readiness. First, you need to have an active Roblox account and a published experience (game) that you own. You can't create Gamepasses for games you don't own or for experiences that are still in a completely unpublished draft state. Make sure your game is set to public, or at least visible enough for you to access its settings.
Second, consider the purpose and value of your Gamepass. What will it offer players? Is it unique? Does it provide a significant advantage or a desirable cosmetic? Having a clear concept before you begin the technical steps will save you time and help you design a more compelling Gamepass. For instance, if your game is a popular social hang-out, a 'VIP Lounge Access' Gamepass might be perfect. If it's a competitive obstacle course, a 'Double Jump' ability could be a strong seller. Planning ahead ensures your Gamepass aligns with your game's theme and player expectations.
What Are the Step-by-Step Instructions to Create a Gamepass on Roblox?
Creating the Gamepass asset itself is a straightforward process on the Roblox Creator Hub. This is where you define its basic identity before it comes alive in your game. Here's a breakdown:
1. Access the Creator Hub: Log in to Roblox and navigate to the Creator Hub (create.roblox.com). In 2026, this is the central portal for all your development needs.
2. Select Your Experience: On the dashboard, find and click on the specific experience (game) for which you want to create the Gamepass.
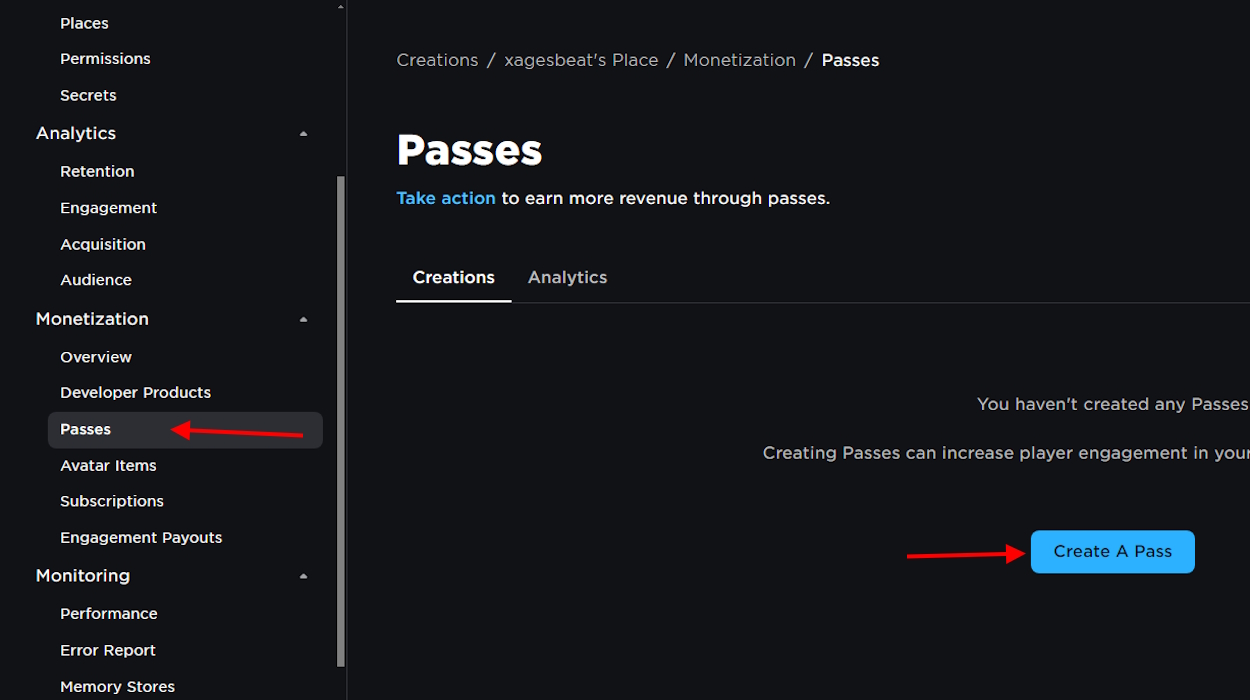
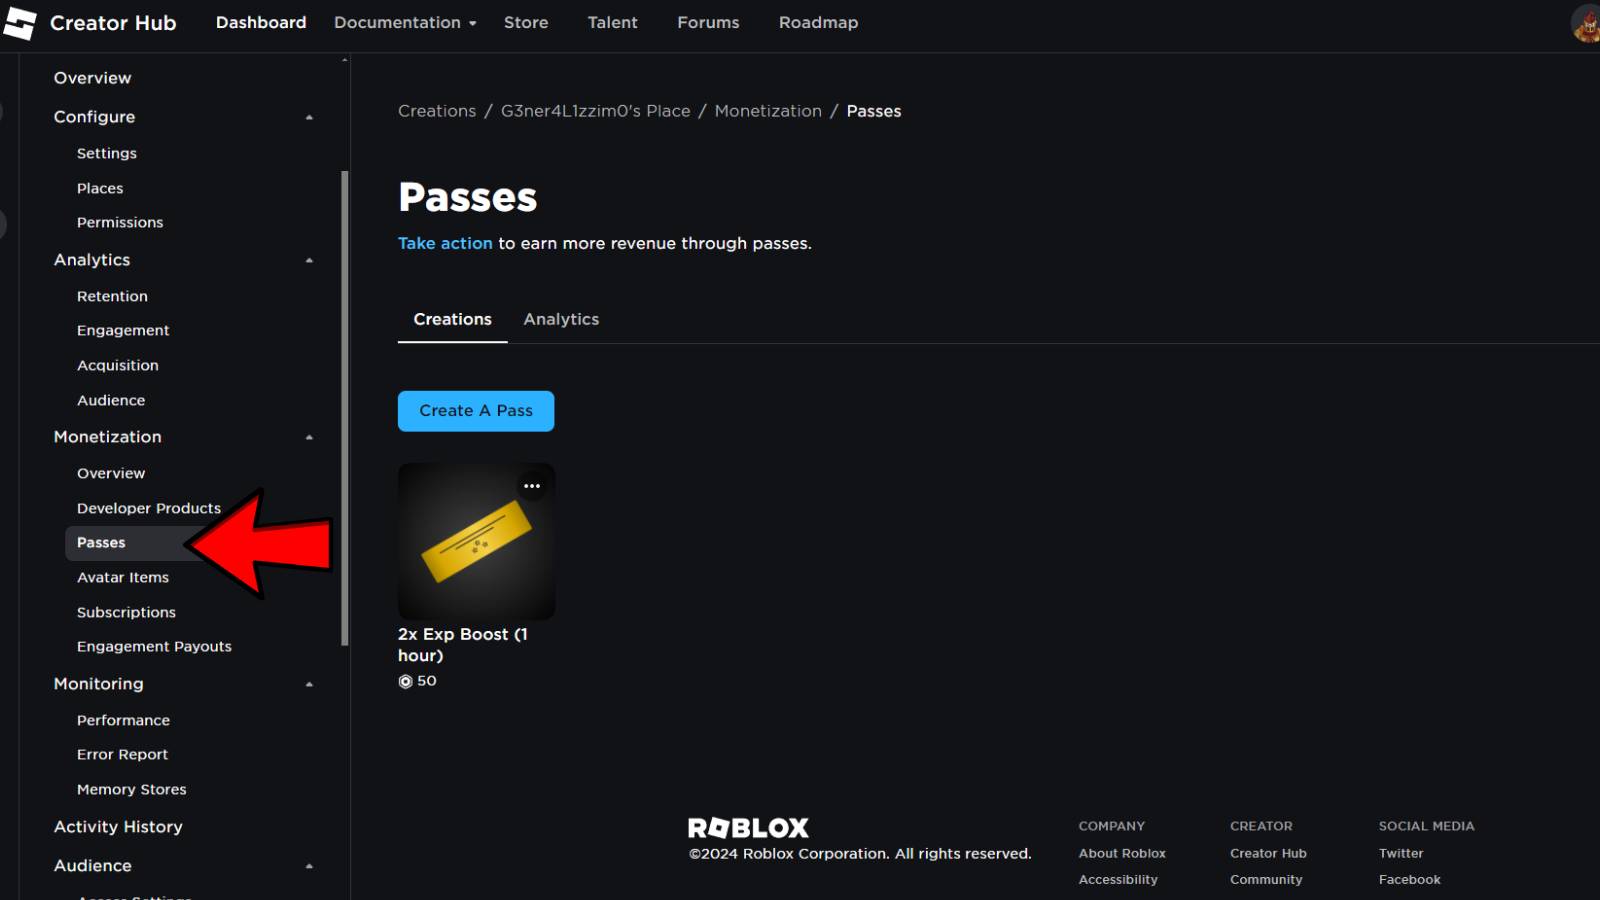
3. Go to Associated Items: In the left-hand menu, under 'Monetization', click on 'Associated Items'. This section manages all items linked to your game, including Gamepasses.
4. Choose Game Passes: Select the 'Game Passes' tab. You'll see any existing Gamepasses you have for this experience.
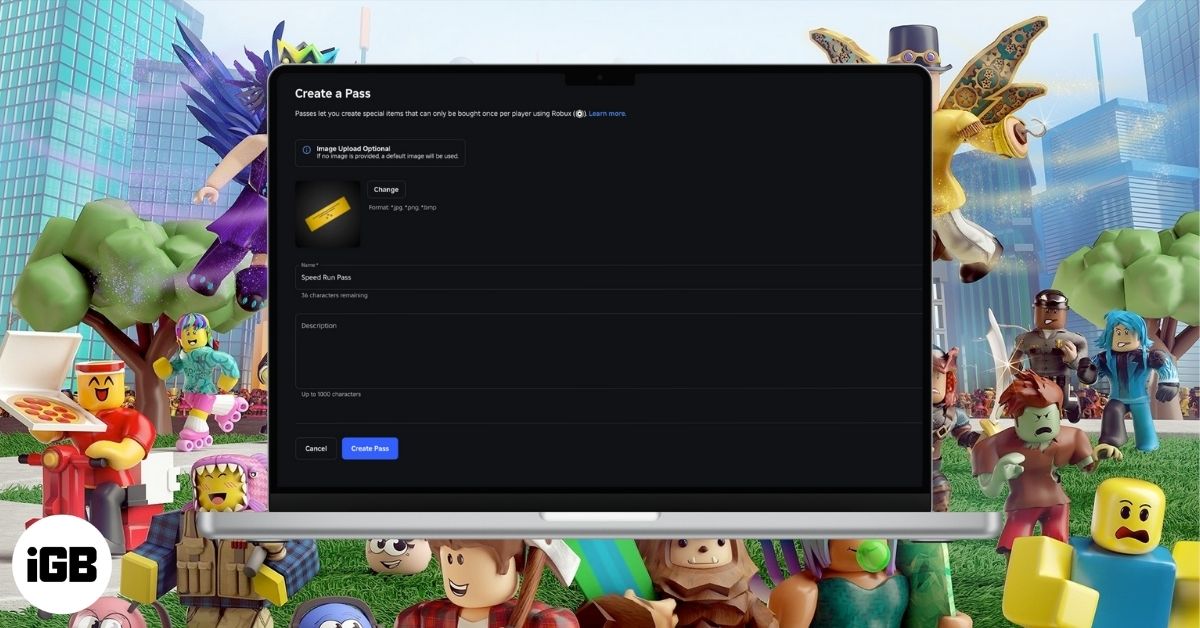
5. Create a Game Pass: Click the 'Create a Game Pass' button. This will open a new window.
6. Upload Image: Choose a compelling image that represents your Gamepass. This image will be its visual identity on the sales page. Make it high-quality and relevant!
7. Name and Description: Give your Gamepass a clear, appealing name and a concise but informative description. The description should highlight the benefits players will receive. For example, 'Speed Coil Pass: Gain permanent 2x speed boost!'
8. Save Changes: Click 'Create Game Pass'. The asset is now created, but it's not yet on sale or integrated into your game.
Remember, a great image and description are your first sales pitch, so make them count!
How Can I Configure Gamepass Settings and Price It Effectively?
After creating the Gamepass asset, the next crucial step is to configure its sales settings, primarily setting its price. This determines how much Robux players will need to spend and when it appears for purchase. Effective pricing is an art, balancing player value with your monetization goals.
To configure your Gamepass:
1. Locate Your New Game Pass: From the 'Game Passes' tab in the Creator Hub, find the Gamepass you just created and click on it.
2. Access Sales Settings: In the left-hand menu, click on the 'Sales' tab.
3. Toggle 'Item for Sale': Switch the 'Item for Sale' toggle to 'ON'. This makes your Gamepass purchasable.
4. Set Price in Robux: Enter the desired price in Robux. Consider your game's economy and player base. Prices typically range from 25 Robux for small perks to several hundreds or even thousands for truly game-changing or exclusive items.
5. Save Changes: Click the 'Save Changes' button. Your Gamepass is now officially on sale!
When pricing, remember that Roblox takes a 30% commission, meaning you'll receive 70% of the sale. Research similar games in your genre to see their Gamepass pricing. Sometimes, a slightly lower price encourages more sales, while high-value, rare items can justify a premium. The goal is to provide value that players are willing to pay for, encouraging both purchases and continued engagement.
What's the Best Way to Integrate a Gamepass into My Roblox Game Script?
Creating the Gamepass is just the first half; the real magic happens when you integrate it into your game's code. This allows your experience to actually detect ownership and grant the associated benefits. This typically involves using Roblox's MarketplaceService to check if a player owns a specific Gamepass.
Here's a common approach using a server-side script (e.g., in ServerScriptService) for security and reliability:
local MarketplaceService = game:GetService("MarketplaceService")
local Players = game:GetService("Players")
local YOUR_GAMEPASS_ID = 12345678 -- Replace with your actual Gamepass ID
local function giveGamepassBenefit(player)
-- Example benefit: Give a tool
local tool = Instance.new("Tool")
tool.Name = "SuperSpeedCoil"
tool.Parent = player.Backpack
print(player.Name .. " received SuperSpeedCoil from Gamepass!")
end
local function onPlayerAdded(player)
local success, ownsGamepass = pcall(function()
return MarketplaceService:PlayerOwnsAsset(player, YOUR_GAMEPASS_ID)
end)
if success and ownsGamepass then
giveGamepassBenefit(player)
elseif not success then
warn("Error checking Gamepass ownership for " .. player.Name .. ": " .. ownsGamepass)
end
end
Players.PlayerAdded:Connect(onPlayerAdded)
Remember to replace 12345678 with your actual Gamepass ID, which you can find in the Gamepass URL on the Creator Hub. This script checks ownership when a player joins and provides the benefit. For items like VIP access, you might check ownership at a specific door or when a player tries to access certain features. Always perform these checks on the server to prevent client-side exploits.
How Do I Test If My Gamepass is Working Correctly in My Game?
Thorough testing is non-negotiable for Gamepasses. The last thing you want is a player spending Robux on something that doesn't work, leading to frustration and potential refund requests. Here’s how to test effectively, especially for busy adult gamers who need efficient workflows:
1. Use Roblox Studio's Test Modes: Roblox Studio offers excellent testing tools. Use the 'Play' or 'Run' modes to simulate gameplay. To test Gamepass ownership without spending Robux, you can temporarily modify your script to assume ownership for your test account, or create a 'Test Gamepass' with a price of 1 Robux for genuine purchases.
2. Simulate Purchase: In a live game, have a friend or an alt account purchase the Gamepass. Then, have that account join your game to verify that the benefits are correctly granted. Pay close attention to:
- Does the UI element (if any) correctly display the Gamepass?
- Is the purchase prompt appearing as expected?
- Does the benefit (tool, access, ability) appear instantly or after a specific action?
- Does the benefit persist if the player leaves and rejoins?
3. Check for Errors: Keep an eye on the Output window in Roblox Studio for any script errors. If the Gamepass isn't working, these errors will often point you to the problem area. Ensure all your Gamepass IDs are correct and that your MarketplaceService calls are properly structured.
4. Review Player Feedback: After releasing, actively monitor your game's comments, social media, or Discord channels for player feedback. Early reports of issues are crucial for quick fixes, building trust with your community.
Remember, a smooth, reliable Gamepass experience reflects well on your game and encourages more purchases.
What Are Some Common Issues When Adding Gamepasses and How Do I Troubleshoot Them?
Even with careful planning, issues can arise. Knowing how to quickly troubleshoot can save you a lot of headache. Here are some common problems and their solutions:
Gamepass Not Showing Up on Sales Page:
Issue: The Gamepass asset is created, but it's not visible for purchase.
Fix: Double-check that you've set the Gamepass to 'Item for Sale' and assigned a price in the Creator Hub's 'Sales' tab. Also, ensure your game is public.
Player Buys Gamepass, But Gets No Benefit:
Issue: The purchase goes through, but the in-game effect isn't granted.
Fix: This is almost always a scripting problem. Verify that your Gamepass ID in the script matches the actual ID. Ensure your
MarketplaceService:PlayerOwnsAsset()call is on a server script and correctly checking ownership. Check yourgiveGamepassBenefit()function for any errors preventing the item or access from being granted. Test it with print statements to trace execution.Gamepass Appears to Work in Studio, But Not in Live Game:
Issue: Your tests in Roblox Studio look fine, but players in the actual game report issues.
Fix: This might be related to network latency or subtle differences in the live environment. Ensure all your checks are server-side. Sometimes,
pcall(protected call) failures forMarketplaceServicecan occur due to temporary Roblox service issues; your error handling should log these. Test with a fresh account in the live game rather than just your Studio test account.Gamepass Not Persistent After Rejoining:
Issue: Players lose their Gamepass benefits after leaving and rejoining the game.
Fix: Ensure your Gamepass ownership check (
PlayerOwnsAsset) is performed every time a player joins the game, ideally within thePlayers.PlayerAddedevent, or at least before the benefit is needed. Benefits like tools should be parented to the player's Backpack or character upon spawn.
A systematic approach to debugging, often using print statements or the debugger in Studio, is your best friend here. Don't be afraid to ask for help on developer forums if you're truly stuck; the Roblox community is vast and supportive.
How Can Gamepasses Help Me Monetize My Roblox Creation Effectively?
Gamepasses are a cornerstone of effective monetization on Roblox, especially for creators aiming for sustainable development without resorting to aggressive tactics. They offer a simple, clear value proposition that resonates with players. For adult gamers who appreciate value for money, Gamepasses are often seen as a worthwhile investment because they provide permanent enhancements to their gameplay experience.
Here's how they contribute to monetization:
Recurring Revenue Potential: While a one-time purchase, a well-designed Gamepass can encourage multiple players to buy, building a consistent revenue stream as your game grows.
Player Loyalty and Engagement: Offering unique benefits through Gamepasses incentivizes players to stick with your game. VIP access or exclusive items can create a sense of belonging and reward loyal fans, turning casual players into dedicated community members.
Funding Future Development: The Robux earned can be re-invested into your game, allowing you to hire artists, scripters, or purchase high-quality assets. This continuous improvement loop keeps your game fresh and attractive, which, in turn, can lead to more Gamepass sales.
Diverse Offerings: You're not limited to just one Gamepass. Create a range of Gamepasses catering to different player needs and budgets, from inexpensive cosmetic upgrades to premium feature unlocks. This broadens your monetization potential significantly.
By focusing on Gamepasses that genuinely enhance the player experience, you build a positive relationship with your community, turning support for your game into a win-win situation.
What Are the Best Practices for Promoting Gamepasses to My Players?
Having amazing Gamepasses is one thing; getting players to discover and purchase them is another. Effective promotion doesn't mean being pushy; it means clearly communicating value and making discovery easy. For gamers balancing life, clear communication is crucial.
In-Game Store UI: Create an easily accessible and visually appealing in-game store where players can browse and purchase Gamepasses. Use clear icons, names, and descriptions that highlight benefits.
Contextual Prompts: Consider subtle in-game prompts. For example, if a player tries to enter a VIP area, a pop-up could suggest purchasing the 'VIP Access Gamepass'. If they keep dying, suggest a 'Shield Gamepass'.
Social Media and Community Engagement: Announce new Gamepasses or highlight popular ones on your game's Discord server, YouTube channel, or Roblox group page. Show off the benefits in short video clips or eye-catching images. This month, social gaming trends are stronger than ever, so leverage platforms where your audience already gathers.
Clear Value Proposition: Always emphasize what players gain. Instead of 'Buy X Gamepass', say 'Unlock Exclusive X Ability: Dominate the Arena with a Permanent Speed Boost!'
Limited-Time Sales (Used Sparingly): While Gamepasses are permanent, occasionally running a limited-time discount can create urgency and boost sales, especially for existing players. Use this sparingly to maintain the perceived value.
Creator Influence: If you stream or create content about your game, showcase the Gamepasses in action. Your personal endorsement can be incredibly persuasive for your community.
Remember, the goal is to inform and excite players about the value your Gamepasses bring, not to pressure them into buying.
Are There Any Alternatives to Gamepasses for In-Game Monetization?
While Gamepasses are incredibly effective, they're not the only way to monetize your Roblox game. A balanced monetization strategy often involves a mix of methods to cater to different player preferences and spending habits.
Developer Products: These are consumable, one-time use items. Examples include in-game currency packs, temporary power-ups, single-use teleports, or instant health refills. They are great for quick, impulse purchases and cater to players who prefer smaller, more frequent transactions.
Private Servers: Many games allow players to purchase private servers (VIP Servers) where they can play with friends or without interruptions. This offers a premium, customizable experience and is a steady source of revenue for many popular titles.
Affiliate Sales: You can earn Robux by integrating avatar shop items into your game. If players purchase items from the avatar shop after seeing them in your game (e.g., on an NPC or as an outfit recommendation), you can receive a commission.
Premium Payouts: This is an automatic system where Roblox pays developers based on how much time Premium subscribers spend in their games. While not a direct monetization strategy you control, focusing on engaging content naturally increases Premium Payouts.
Combining Gamepasses with one or two other monetization methods can create a robust ecosystem for your game, ensuring you cater to a broader audience while maximizing your earning potential. Always prioritize player experience and ethical monetization practices.
Conclusion
Mastering how to add Gamepasses Roblox experiences is a powerful skill for any creator, especially for busy adult gamers looking to make the most of their creative efforts. We've walked through everything from initial setup and careful configuration to the vital scripting and troubleshooting that ensures a smooth player experience. By offering valuable, permanent benefits, Gamepasses not only enhance your game but also provide a sustainable monetization model, allowing you to continually improve and expand your digital worlds.
Remember, the heart of any successful Gamepass lies in its value proposition to the player. Focus on creating items or access that genuinely enrich their time in your game, and you'll build a loyal community eager to support your vision. The world of Roblox development is constantly evolving, but the principles of creating engaging content and offering clear value remain timeless. Now that you're armed with this knowledge, go forth and create something amazing!
What's your biggest challenge when monetizing your Roblox games? Comment below!
FAQ Section
Q: What is the difference between a Gamepass and a Developer Product?
A: A Gamepass is a one-time purchase that grants permanent access or benefits within a specific game, like a VIP area or a unique tool. A Developer Product is a consumable item, meaning it can be purchased multiple times and provides temporary benefits, like in-game currency or a temporary power-up.
Q: Do I need to use Roblox Studio to create a Gamepass?
A: You create the Gamepass asset and set its price on the Roblox Creator Hub (website). However, to make the Gamepass functional and grant its benefits within your game, you will need to use Roblox Studio to write the necessary scripts that detect ownership and apply the effects.
Q: Can players purchase Gamepasses from outside my game?
A: Yes, Gamepasses are available for purchase from their dedicated page on the Roblox website, which players can access directly or via links. When a player purchases a Gamepass this way, the in-game script will detect their ownership the next time they join your experience.
Q: How much Robux do I earn from each Gamepass sale?
A: For every Gamepass sale, Roblox takes a 30% commission. This means you, as the creator, will receive 70% of the Robux revenue. This is a standard platform fee across various monetization options on Roblox.
Q: Is it possible to delete a Gamepass after it has been created?
A: While you can take a Gamepass off sale, you generally cannot permanently delete a Gamepass that has been published and potentially purchased by players. Removing it from sale prevents new purchases, but the asset itself and past purchases remain recorded to respect existing player ownership.
Q: How long does it take for a Gamepass to appear after I create it?
A: The Gamepass asset typically appears on the Creator Hub almost instantly after creation. Once you set it 'On Sale' and define a price, it becomes purchasable on its dedicated page. For in-game functionality, it relies on your scripts to detect ownership, which is usually immediate upon a player joining or specific in-game events.
Learn to create and configure Roblox Gamepasses easily. Integrate Gamepasses into your game scripts for functionality. Troubleshoot common Gamepass issues effectively. Discover best practices for Gamepass promotion and monetization. Understand the value Gamepasses add to player experiences and developer income.
35



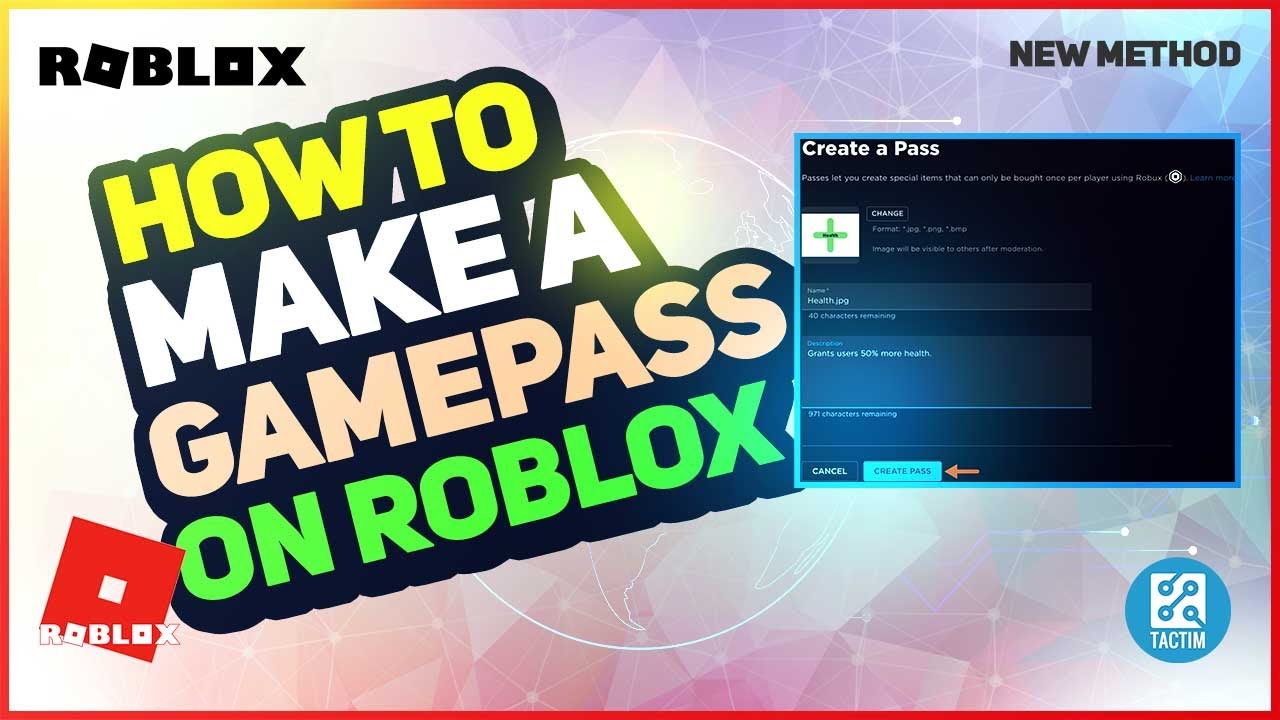
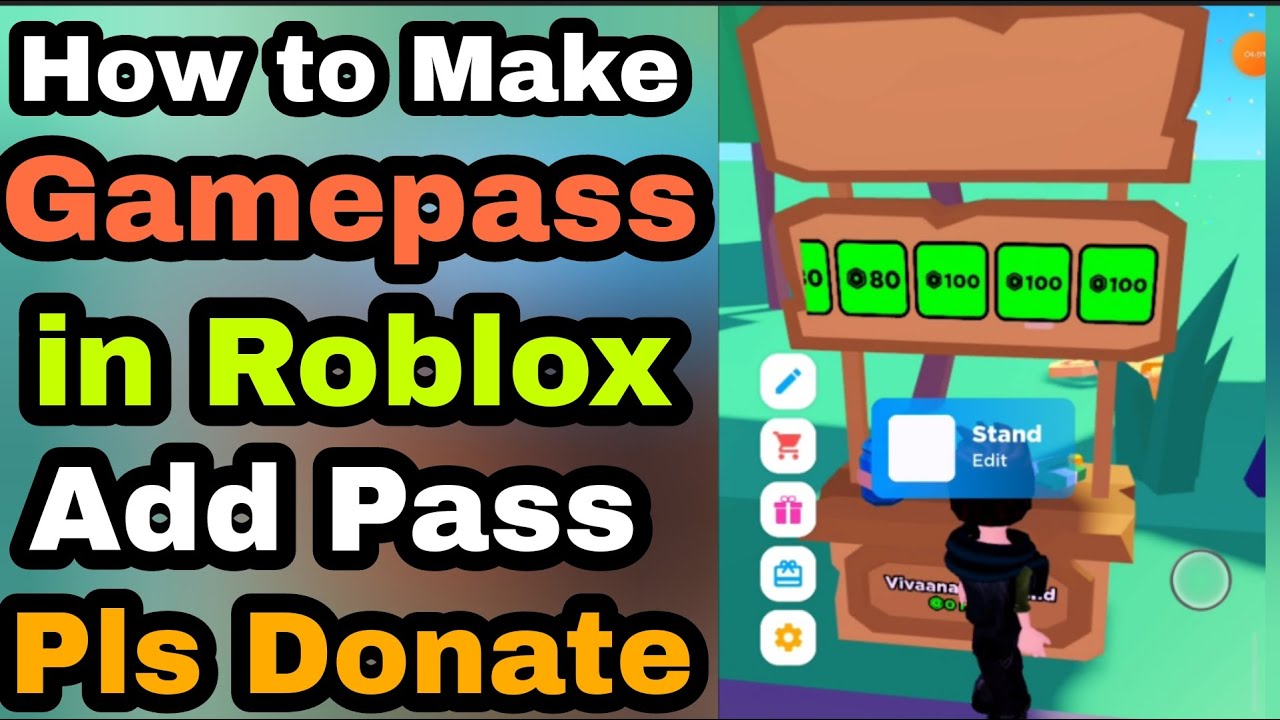
How To Create A GAMEPASS On Roblox FULL GUIDE 2026 YouTube . How To Add Gamepasses To Your Stand In Roblox Pls Donate YouTube . How To Make A Gamepass In Roblox QUICK TUTORIAL YouTube . How To Make A Game Pass On Roblox Step By Step Guide IGeeksBlog How To Make A Game Pass On Roblox . HOW TO ADD GAMEPASSES INTO YOUR ROBLOX GAME Roblox Studio YouTube


How To Make A Game Pass In Roblox Guide Beebom Passes Option To Create A Pass . How To Make A Gamepass In Roblox Full Guide YouTube . How To Make Gamepass In Roblox Full Guide YouTube . How To Make Gamepasses On Roblox Pro Game Guides Roblox Making Gamepass 2 . How To Make A Gamepass In Roblox Full Tutorial YouTube


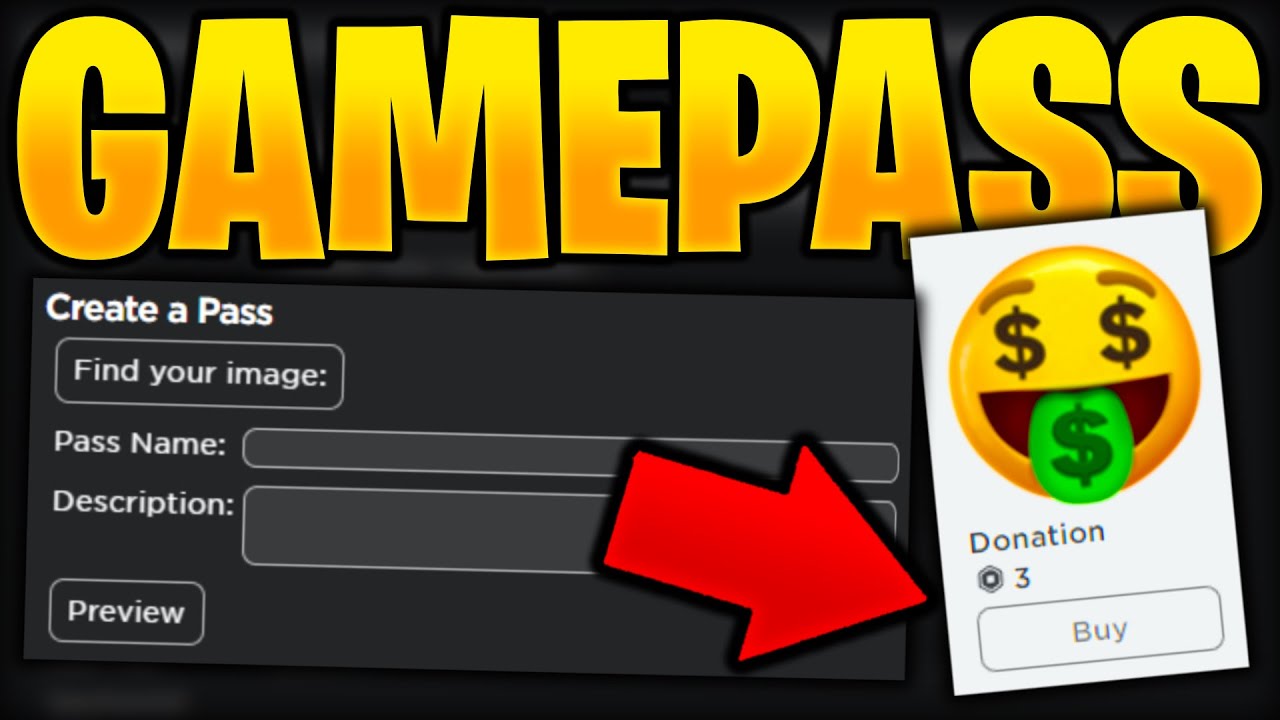
How To Make A Gamepass On Roblox Step By Step Guide 2025 YouTube . How To Make A Gamepass On Roblox Created Gamepasses In Roblox Add . How To Make Gamepass In Roblox 2026 Full Guide YouTube . How To Make Gamepasses On Roblox Mobile YouTube . How To Make GAMEPASSES On Roblox EASY YouTube

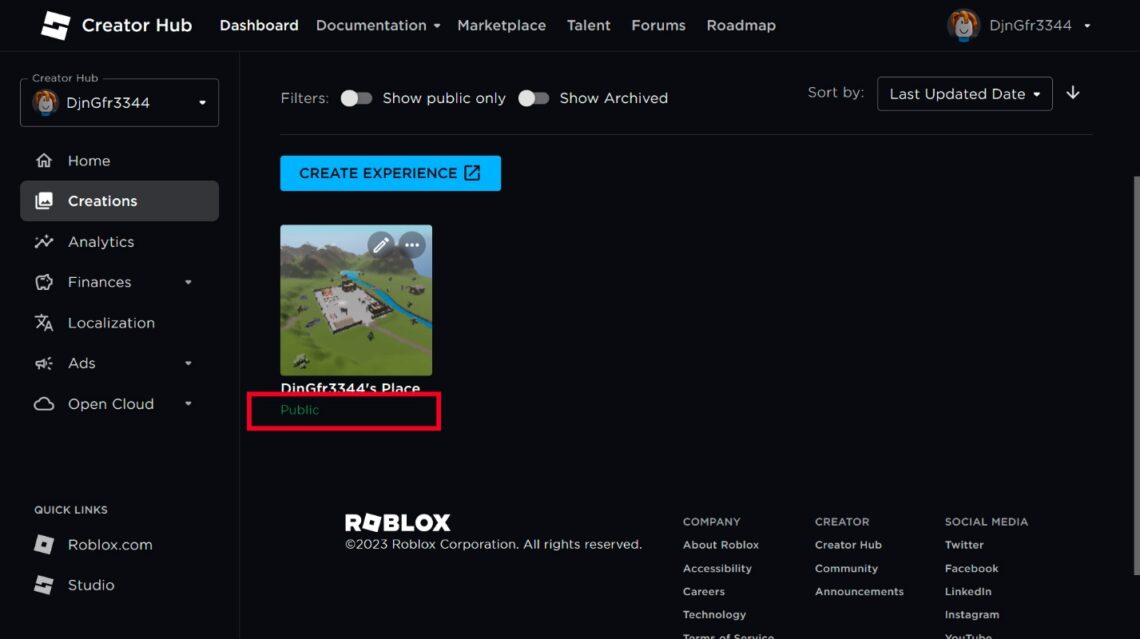


How To Make Gamepasses In Roblox 2026 YouTube . Gamepass In Roblox How To Create It In 2026 Word Image 332981 5 1140x639 . How To Make A Gamepass In Roblox In 2026 YouTube . How To Make Gamepasses On Roblox Pro Game Guides Roblox Making Gamepass 3 . How To Make A Gamepass On Roblox Step By Step Guide Copy Of WWE 2K25



How To Make Gamepasses Pls Donate In Roblox Create Roblox Gamepass . How To Add Gamepasses In Roblox YouTube . How To Make Gamepasses In Pls Donate Roblox 2023 Add Gamepass To Pls . Roblox Tutorial How To Make And Use Gamepasses YouTube . How To Create Gamepasses In Roblox Mobile After New Update 2023 YouTube



How To Make A Gamepass On Roblox How To Create Your Gamepass In. How To Make Gamepasses In Roblox Studio 2023 YouTube Hqdefault . How To Make A Game Pass On Roblox Step By Step Guide ONE Esports Roblox Step4 GoToPasses . How To Make A Game Pass On Roblox Step By Step Guide ONE Esports Roblox Step7 600x338 . How To Make A Game Pass On Roblox A Beginner S Guide Make A Gamepass On Roblox Step 20



How To Make Gamepass In Roblox Update 2024 YouTube . Gamepass In Roblox How To Create It In 2026 Word Image 332981 1 . How To Add GamePasses To Your Roblox Game YouTube . How To MAKE GAMEPASSES In Roblox Studio EASY YouTube . UPDATED How To REFUND Items On Roblox 2026 Gamepasses UGC Robux