Ever wondered about the true potential of decals in Roblox and how players achieve those incredibly large, striking visuals within their games? This comprehensive guide dives deep into understanding the technical limitations and creative workarounds for implementing the biggest decals possible. We will explore various strategies, from leveraging multiple smaller images to advanced scripting techniques, ensuring your creations stand out. Discover why the Roblox community is constantly pushing the boundaries of visual design and how you can apply these trending methods to enhance your own projects. This informational resource is perfect for creators looking to elevate their game aesthetics, offering practical tips and insights into optimizing decal usage for both impact and performance. Uncover the secrets behind massive in-game advertisements, environmental textures, and artistic installations, ensuring your Roblox world captivates every visitor. Learn about current year trends and what top developers are doing to maximize visual fidelity.
Welcome to the ultimate living FAQ about the biggest decals in Roblox, meticulously updated for the latest patches and engine changes! Ever stared at a massive, breathtaking mural in a Roblox game and wondered, "How did they even do that?" You're not alone! This guide cuts through the noise, offering clear, actionable answers to all your burning questions about creating and optimizing colossal decals. We'll cover everything from beginner concepts to advanced optimization techniques, ensuring you have all the knowledge to transform your game's visual landscape. Prepare to unleash your creativity with truly epic scale!
Most Asked Questions about Biggest Decal in Roblox
What is the effective size limit for a single Roblox decal?
The effective maximum resolution for a single Roblox decal after platform processing is generally around 1024x1024 pixels. While you can upload larger images, Roblox often compresses or downscales them to ensure consistent performance across diverse devices. Designing your original artwork near this limit helps maintain clarity.
How do creators achieve massive in-game images in Roblox?
Creators achieve massive images by using a technique called tiling or segmentation. They break one large image into many smaller, individual decal segments. Each segment is then uploaded as a separate decal and precisely arranged side-by-side in Roblox Studio, forming a colossal composite image. This bypasses single-asset resolution limits.
What are common issues when trying to display very large decals?
Common issues include 'Z-fighting' where overlapping surfaces cause flickering, visible 'seams' between tiled segments due to imperfect alignment, and significant performance drops. Large numbers of individual decals can strain system resources, leading to lag, especially on lower-end devices. Proper optimization is crucial to mitigate these problems.
Are there performance impacts from using many large decals?
Yes, there are significant performance impacts. Each unique decal and its associated geometry increases the 'draw calls' on the game engine, consuming more memory and CPU resources. Excessive use of high-resolution, multi-part decals can lead to reduced frame rates, longer loading times, and a generally less smooth player experience. Optimization techniques are vital.
What tips help optimize large decal usage in Roblox?
To optimize large decal usage, use the smallest effective resolutions for individual segments, limit unique decal IDs, and employ proper material choices. Consider utilizing custom meshes with baked textures for massive, static surfaces, which can be more efficient. Implement streaming enabled features and level-of-detail culling for dynamic loading, improving overall game performance.
Can I use meshes instead of decals for big images?
Yes, using meshes with custom textures is often a highly effective and more performant alternative for large, intricate images in Roblox. You can create a 3D model in external software, unwrap it, and apply a single large texture. This mesh is then imported into Roblox Studio. This method frequently reduces draw calls compared to numerous individual decal parts, enhancing game efficiency and visual fidelity for expansive surfaces.
How can I make tiled decals blend seamlessly?
To make tiled decals blend seamlessly, ensure your original image is designed without harsh edges at the tile boundaries. When splitting the image, use a precise grid. In Roblox Studio, position each decal segment with absolute accuracy, utilizing numeric properties for 'Position' rather than relying solely on visual dragging. Small positional offsets can introduce visible gaps or overlaps, so pixel-perfect alignment is paramount for a smooth, unified appearance. Test thoroughly.
Still have questions?
Check out our other guides: 'Roblox Studio Optimization: A Deep Dive,' 'Mastering Roblox Textures: Beyond the Basics,' and 'Advanced Scripting for Roblox Environments.'
So, you're curious about the biggest decal in Roblox, right? Well, it's not quite like finding the biggest painting in a museum; Roblox works a bit differently. Instead of one single, ginormous image file you just plop down, creators get super clever. They take one big picture, chop it up into smaller, manageable pieces – think of it like a giant digital jigsaw puzzle. Each piece is its own little decal. Then, they carefully put all those pieces back together in their game, side-by-side, to form one absolutely massive image! It's all about tricking your eye and the game engine into seeing one huge, impressive visual.
It's a really smart workaround because Roblox has some practical limits on how big a *single* image file can be before it gets squashed down for performance. So, by breaking it up, developers can make incredibly detailed murals, gigantic ads, or expansive textures that feel truly epic. The cool part is how much creativity this sparks. It pushes people to figure out innovative ways to make their games look stunning without crashing everyone's computer. It's a testament to the ingenuity of the Roblox community, always finding ways to make their wildest visual dreams a reality. It's not just about size; it's about smart design and a bit of digital elbow grease!
Hey fellow builders and creators, ever found yourself pondering, "What's the biggest decal you can actually put into Roblox?" It's a question that certainly sparks curiosity among many in our vibrant community. We all want our builds to pop, to have that undeniable visual flair that captures attention and immersion. Decals are absolutely central to achieving that unique aesthetic within your Roblox experiences. From subtle textures that add depth to massive murals transforming an entire landscape, decals are the unsung heroes of visual storytelling in our favorite platform. But how far can we truly push their boundaries? Let's dive in and explore the fascinating world of Roblox decals, their limitations, and the ingenious ways creators are making them appear colossal.
Understanding Roblox's image system and its inherent constraints is your first step. While there isn't one single "biggest decal" in terms of a monolithic image file, the magic often lies in creative implementation. Developers have found clever methods to bypass what seem like hard limits, creating awe-inspiring large-scale visuals. This isn't just about uploading a huge picture; it involves understanding rendering, optimization, and how the Roblox engine interprets your visual assets. We're going to break down these strategies, offering you an expert's perspective on maximizing your visual impact. Get ready to elevate your builds beyond the ordinary!
Understanding Roblox Decal Mechanics
Roblox decals are essentially images applied to surfaces within your game world. They are uploaded to the platform and assigned a unique Asset ID. Once you have this ID, you can use it across various parts, meshes, and even UI elements. The engine then renders this image onto the selected surface, bringing your creations to life. It's a fundamental aspect of customizing game environments and adding crucial details. Many players wonder about the pixel dimensions for these assets. The platform has specific guidelines regarding image sizes. Understanding these guidelines is absolutely critical. For optimal performance and visual clarity, specific resolutions are recommended.
Historically, Roblox has focused on balancing visual quality with performance for its vast user base. This means there are technical limitations on the resolution of individual image assets you can upload. While you might try uploading an extremely high-resolution image, Roblox often downscales it to maintain consistent performance across different devices. This downscaling helps ensure that games run smoothly, even on older hardware or mobile devices. Therefore, simply uploading a massive image file doesn't necessarily result in a massive, high-resolution decal in your game. The true art comes from working within these system parameters cleverly.
The current effective maximum resolution for a single decal in Roblox, after processing, usually hovers around 1024x1024 pixels. You can technically upload images with higher resolutions, but the engine will likely compress or resize them. This compression ensures faster loading times and reduced memory usage for every player. It's a necessary trade-off for accessibility across millions of users and devices worldwide. Knowing this helps you manage expectations regarding single-image clarity. Instead of fighting the system, smart developers embrace these limits. They find innovative ways to achieve larger visuals. These methods often involve breaking down a big image into smaller, manageable parts. This technique is often referred to as 'tiling.' Tiling allows for creating expansive and intricate designs. It is a cornerstone for creating truly massive visual displays.
Pushing the Pixel Frontier Historical Context
In the early days of Roblox, the available tools for creators were much simpler, and visual fidelity wasn't the primary focus. Decals were often used for basic textures or simple signs, with relatively low resolution being the norm. As the platform matured and technology advanced, so did the ambitions of its developers. Players began experimenting with larger and more complex visual elements, pushing the boundaries of what was thought possible. The community started sharing techniques for creating murals and expansive environmental details, inspiring others to do the same. This constant innovation has always been a hallmark of the Roblox development scene. It continually drives new creative solutions.
Over time, the demand for higher quality graphics and more immersive experiences grew exponentially. This pushed Roblox to improve its engine's capabilities, allowing for better rendering and slightly larger effective decal resolutions. However, the core principle of optimizing for performance across diverse hardware remained. This led to a fascinating evolution of strategies for displaying large images. Instead of waiting for Roblox to support single-file gigapixel decals, which would be impractical, developers found ways to simulate them. They harnessed the existing tools in ingenious ways. The desire for grander visuals spurred many creative scripting solutions. These solutions made seemingly impossible displays a reality for many. This historical progression highlights the platform's adaptability.
One notable historical workaround involved using multiple decal parts arranged precisely side by side. Imagine taking a large poster and cutting it into several smaller squares. Each square is a separate decal, but when put together, they form the complete original image. This method, while labor-intensive, was incredibly effective for creating massive textures or signs. It allowed for unprecedented scale in game environments. Developers often employed this technique for skyboxes, large architectural details, or expansive ground textures. The introduction of tools like unions and eventually meshes further refined these methods. These advancements made it easier to create complex shapes and apply textures. It also improved overall asset management within games, enhancing creative possibilities. The constant evolution of tools and techniques really showcases the ingenuity of the community.
Current Limitations and Workarounds
As of the current year, the fundamental limitation of individual decal resolution in Roblox remains. You're typically looking at an effective maximum of 1024x1024 pixels for a single asset after the platform processes it. This is important to remember when designing your images outside of Roblox. Uploading a 4K image might seem like a good idea for crispness, but it will likely be downscaled, potentially losing some of its intended detail. This often catches new creators off guard when their high-res art doesn't look as sharp in-game. It's not a bug; it's an optimization. Therefore, designing your initial image closer to the effective maximum can save you time and frustration. Always test your decals in-game to see how they render.
However, the real power for creating truly massive decals comes from clever workarounds. The most prevalent and effective method is **tiling** or **segmentation**. This involves breaking a large image into multiple smaller, individual decals. Each segment is then uploaded separately and precisely positioned in your Roblox build to form the complete large image. Think of it like a digital mosaic. This technique is fantastic for creating incredibly detailed murals, huge advertisements, or expansive landscape textures without hitting single-decal resolution limits. You get to control the overall size and effective resolution by using more segments. This method dramatically expands your creative canvas. It allows for highly intricate and expansive visual elements. This is really how you achieve those huge, impressive visuals you see in top games.
Another advanced workaround involves **scripting dynamic decal loading and scaling**. While more complex, this method allows for impressive flexibility. Developers can use scripts to load decal IDs dynamically, adjust their transparency, and even animate their appearance. For truly massive, complex visuals, some creators will even utilize meshes with custom textures. These meshes can effectively stretch a texture across a larger surface more efficiently than many individual parts. This offers a powerful alternative for specialized applications. Moreover, understanding how different parts and materials interact with decals is key. Surfaces like SmoothPlastic or Glass will render decals differently. Experiment with various material properties to achieve your desired visual effect. Performance considerations are also crucial here; too many individual parts with decals can cause lag. Optimizing your approach is paramount for a smooth player experience.
Why Bigger Isn't Always Better But It's Still Cool
While the allure of having the absolute biggest decal in Roblox is undeniably strong, it's essential to understand the implications. Simply making something large doesn't automatically make it better or more impactful. Performance is a significant factor in any Roblox experience. A game filled with hundreds of extremely large, high-segment decals can quickly become resource-intensive. This can lead to lag, slow loading times, and a poor user experience, especially for players on less powerful devices. Remember, a massive audience uses Roblox, and optimizing for all devices is a mark of a considerate developer. It’s all about finding that perfect balance. You want your visuals to impress, not to frustrate players with constant stuttering.
The strategic use of decals, regardless of their size, often trumps sheer scale. A well-placed, cleverly designed medium-sized decal can be far more effective than a giant, poorly optimized one. Consider the purpose of your decal: is it a focal point, a background element, or a subtle detail? Each purpose might require a different approach to size and implementation. Sometimes, a smaller, sharper decal on a prominent object makes a bigger statement. It can draw the player's eye precisely where you want it. This kind of thoughtful design elevates your game beyond just technical capability. It shows a true understanding of player engagement and visual hierarchy within your world.
That said, the sheer spectacle of a truly massive, well-executed decal is undeniably cool. It showcases technical prowess and artistic vision. Imagine a sprawling cityscape mural covering an entire skyscraper, or an intricate map projected across an enormous floor. These grand statements create a memorable and immersive environment. They can define the aesthetic of an entire game world. Achieving this requires careful planning, optimization, and often, a bit of scripting magic. It's about demonstrating what's possible within Roblox's engine when you push the boundaries intelligently. The satisfaction of seeing your enormous creation perfectly rendered and enjoyed by players is truly rewarding. It's a testament to both your technical skill and your creative ambition, proving that with careful effort, bigger can indeed be better.
Finding and Using Epic Decals
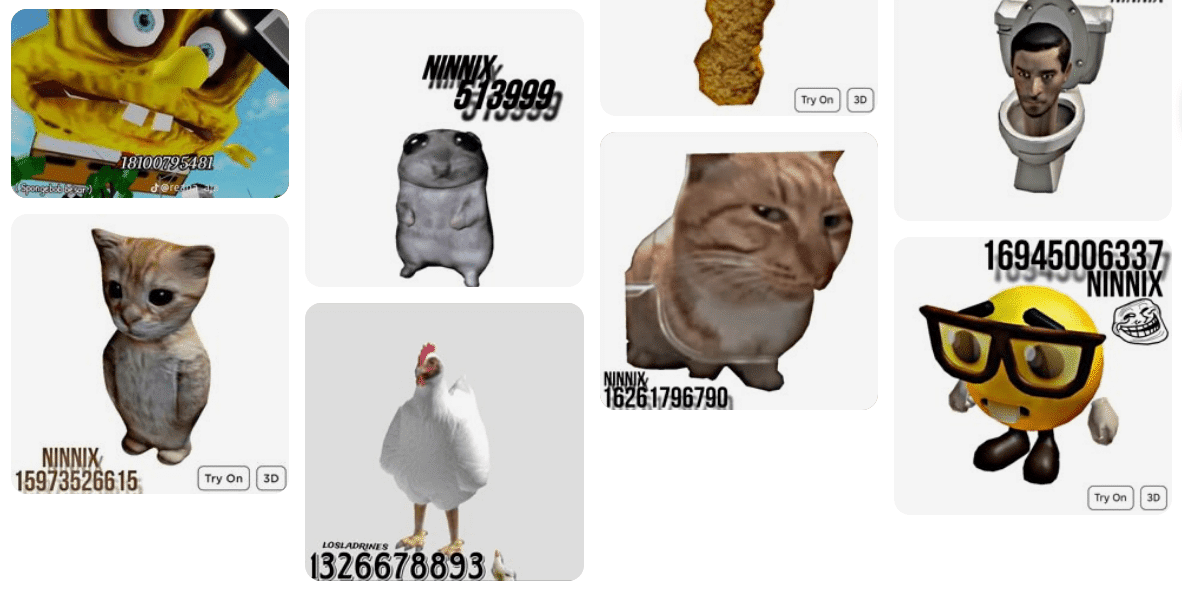
For many creators, finding the perfect decal is just as important as knowing how to implement it. Roblox offers a vast library of user-created decals that you can browse through. Simply head to the Roblox website and navigate to the "Create" section, then look for the "Decals" category. Here, you'll find an endless array of images uploaded by other users. You can search for specific themes, styles, or even colors. This is an excellent starting point for anyone looking to quickly enhance their builds without having to create every single asset from scratch. Always check the content to ensure it fits your game's theme and is appropriate. Many creators generously share their fantastic work. This makes it easier for everyone to build incredible experiences. It truly is a collaborative platform.
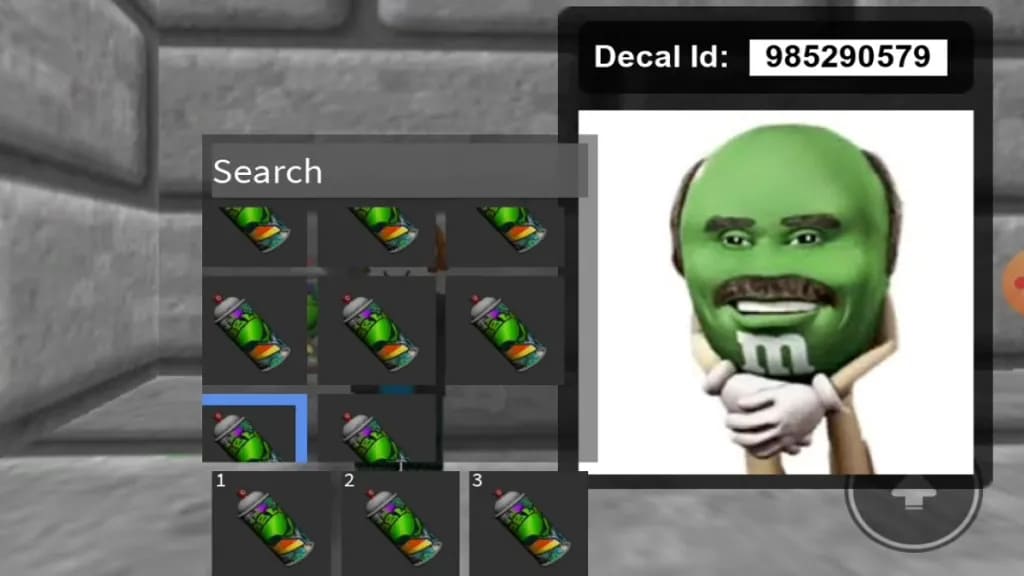
When you find a decal you like, simply copy its Asset ID. This ID is a string of numbers found in the decal's URL or by clicking the three dots next to it in Studio and selecting "Copy Asset ID". Once you have the ID, you can paste it into the Texture property of a Part, MeshPart, or even an ImageLabel in a ScreenGui. It's a straightforward process that allows for quick application of visual elements. Remember to properly attribute creators if you're using their assets, especially in public games. Respecting intellectual property is crucial in the Roblox community. This ensures a healthy and thriving creative ecosystem for everyone involved. Sharing is caring, but acknowledging the original artist is even better. This practice fosters a positive environment.
For those looking for truly "epic" decals, consider creating your own or collaborating with artists. Custom decals allow for unparalleled control over your game's aesthetic and branding. You can design images specifically tailored to your game's unique style and narrative. Utilizing image editing software like Photoshop or GIMP can help you create high-quality, optimized decal assets. Always ensure your custom decals are within Roblox's community guidelines and terms of service. Avoid any inappropriate or copyrighted material to prevent your assets from being moderated. Creating your own assets gives your game a unique identity. It sets it apart from the rest. This personal touch often resonates most with players. It is how you truly make your mark.
Beginner / Core Concepts
1. **Q:** What exactly is a decal in Roblox and how is it used?**A:** A decal in Roblox is essentially a 2D image asset that you can apply onto the surface of 3D objects, like parts or meshes, within your game. It's a fundamental tool for adding visual details, textures, signs, or any graphic elements to your builds. You upload an image to Roblox, get a unique Asset ID, and then use that ID to project the image onto a surface. It's super versatile and helps bring your game's aesthetic to life, whether you're texturing a wall or creating a custom logo. Think of it as a sticker for your virtual world! It makes objects look more realistic or stylized. You've got this!
2. **Q:** Are there specific size limits for individual decal images on Roblox?
**A:** I get why this confuses so many people, because it's not a hard, clear limit on upload. While you can upload images of various dimensions, Roblox's engine typically processes and downscales them to an effective resolution of around 1024x1024 pixels for performance reasons. So, even if you upload a 2048x2048 image, it might not render at that full clarity in-game. This optimization ensures smoother gameplay across all devices. The best practice is to design your source images with this 1024x1024 effective resolution in mind to avoid unexpected quality loss. Keep it close to that number for optimal results. Try this tomorrow and see the difference it makes!
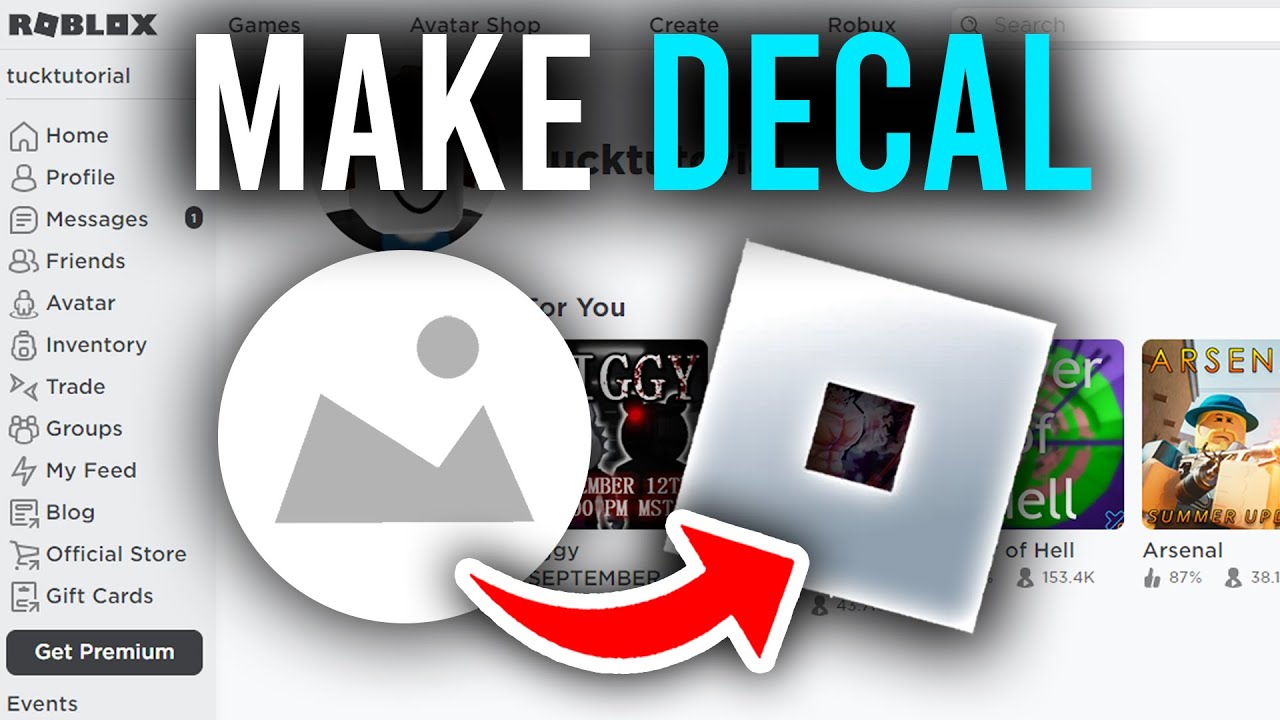
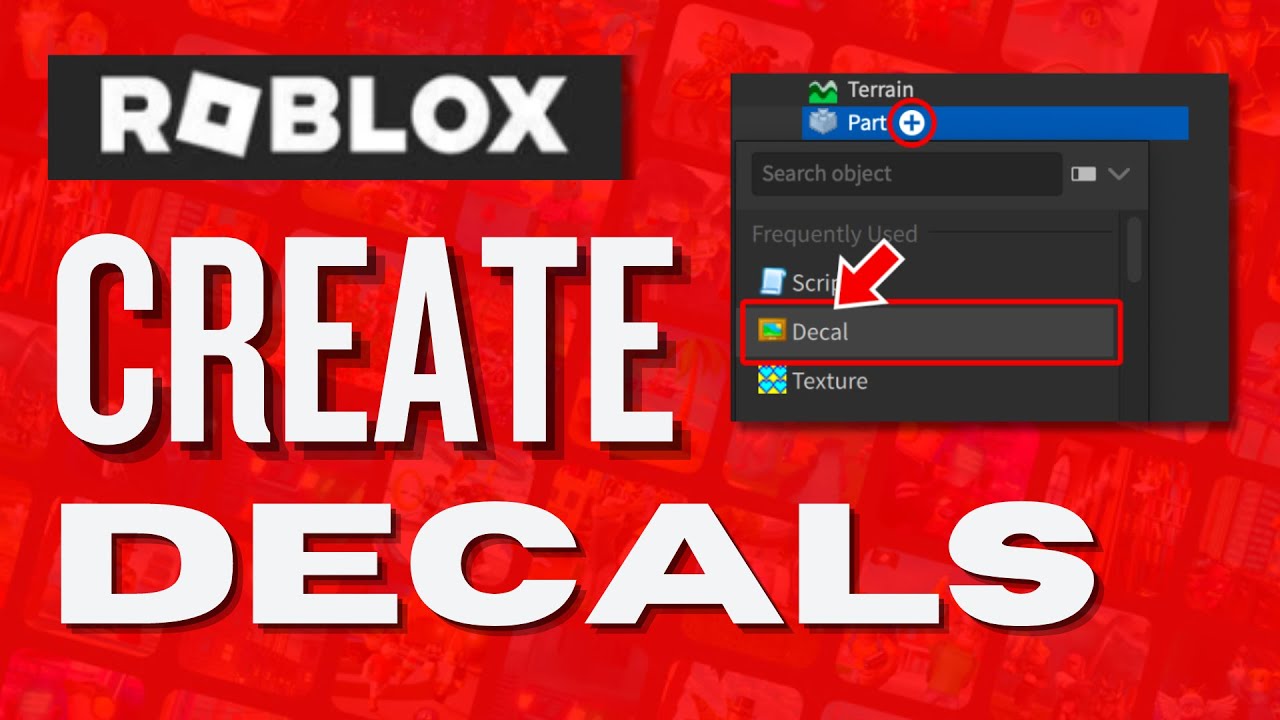
3. **Q:** How do I upload my own images to be used as decals in Roblox?
**A:** Uploading your own images to Roblox is pretty straightforward, and once you get the hang of it, you'll be custom-texturing everything! First, you'll need a Roblox account with a premium subscription or Robux for some uploads, though many basic decals are free. Head over to the Roblox website, click on "Create" in the top menu, then select "Decals" from the left-hand creator dashboard. There's an "Upload Image" button where you can choose your file. Give it a descriptive name, and then hit "Upload." Roblox will process it, and once it's approved, you'll get a unique Asset ID to use in Studio. Remember to follow the community guidelines for content! You're on your way to truly unique creations!
4. **Q:** Why do my decals sometimes look blurry or low-quality in Roblox Studio?
**A:** This one used to trip me up too, and it's a common concern! Often, the blurriness comes down to a few factors. First, as we discussed, Roblox might downscale your high-resolution images for performance, making them appear less sharp. Second, if you're stretching a small decal over a very large surface, it will naturally pixelate and look blurry. Imagine trying to print a tiny photo onto a billboard; it just won't work. Lastly, your Studio graphics settings can impact how images render. Make sure your editor quality level is set high enough to accurately preview your assets. Experiment with resolution and scaling! You've got this, just keep tweaking!
Intermediate / Practical & Production
5. **Q:** How can I make a decal appear much larger than the 1024x1024 effective resolution limit?**A:** This is where the real magic happens, my friend! To make a decal *appear* huge, you'll need to use a technique called **tiling** or **segmentation**. Instead of one giant image, you'll break your large image (e.g., a 4096x4096 mural) into multiple smaller, 1024x1024 (or smaller) pieces. You upload each piece as an individual decal. Then, in Roblox Studio, you arrange these smaller parts side-by-side perfectly, like a giant puzzle, to form the complete massive image. This method allows you to create incredibly detailed, expansive visuals without hitting a single-asset resolution limit. It's more work, but the results are absolutely stunning. This is a pro-tip for massive installations. Give it a shot, you'll be amazed!
6. **Q:** What are the best practices for optimizing large decal usage to avoid performance issues?
**A:** I get why this is a big concern for creators, nobody wants a laggy game! When working with large decals (especially tiled ones), optimization is key. First, ensure your individual segments are as small as they need to be, both in pixel dimensions and file size. Don't use a 1024x1024 segment if 512x512 will do. Second, limit the total number of unique decal IDs and instances in a single area. Each unique decal ID requires a draw call, and too many can slow things down. Consider using a single material (like MeshPart texture) for large, static backgrounds if possible, which can be more efficient than hundreds of individual decals. Finally, employ streaming enabled and level-of-detail (LOD) techniques to load decals only when players are close enough to see them. This keeps things smooth. You're on the path to making amazing, optimized games!
7. **Q:** Can I use textures on meshes to achieve similar large-scale visual effects more efficiently?
**A:** Absolutely, and in many cases, this is actually the *more* efficient and preferred method for truly massive and complex surfaces! Instead of applying decals to individual parts, you can create a custom 3D mesh (in software like Blender) and unwrap it, then apply a single, large texture file to that entire mesh. When you import this mesh into Roblox Studio, the texture will stretch across its surface. This often results in fewer draw calls and better performance than tiling hundreds of individual decal parts. It's a slightly more advanced workflow, but for environmental art, terrain, or large buildings, it's a game-changer. Learning basic 3D modeling for texturing can significantly elevate your game's visual fidelity and optimization. Keep pushing your skills, you've got this!
8. **Q:** How do different Roblox materials affect how decals are displayed?
**A:** This is a fantastic question because materials really change the vibe! Decals are applied as an overlay, and the underlying material's properties (like reflectiveness, transparency, and bumpiness) will interact with it. For instance, a decal on a 'SmoothPlastic' part will look crisp and flat. But put that same decal on a 'Metal' part, and you'll see reflections or a metallic sheen over the image, which can be super cool or totally not what you intended! On 'Glass' or 'ForceField' materials, decals can become transparent or distorted, blending differently. Always test your decals on the specific material you plan to use them on. This ensures you get the exact visual effect you're aiming for. Experimentation is key to mastering this! You'll be a pro in no time.
9. **Q:** What are some common issues or bugs encountered when working with very large or tiled decals?
**A:** Oh, where do we even begin with the quirks of working at scale? One super common issue is **Z-fighting**, where two surfaces (or two parts of a tiled decal) are at the exact same position, causing flickering as the engine struggles to decide which one to render. Tiny positional offsets can fix this. Another problem is **seams** between tiled decals; if your original image isn't perfectly seamless, or your parts aren't aligned pixel-perfectly, you'll see lines. Color banding can also occur if the original image has subtle gradients. And of course, **performance drops** are a constant threat if you overdo it with too many high-resolution segments. Always build with precision and test frequently! You're learning the ins and outs, so keep going!
10. **Q:** Are there any scripting methods to dynamically load or manage large decal sets?
**A:** Yes, there absolutely are, and this is where you step into the advanced territory of truly dynamic environments! You can use Lua scripts to manage decal instances. For example, you might have a large environment where decals are only loaded and made visible when a player enters a certain radius. This is a form of **streaming or culling**. You can store decal IDs in a table and then, through a `LocalScript`, create `Decal` objects on `Parts` as needed, setting their `Texture` property with the stored IDs. This helps to reduce initial load times and improve performance by only rendering what's immediately necessary. It takes a bit of planning and coding, but it's incredibly powerful for large-scale games with lots of unique visual elements. You're going to build some amazing stuff!
Advanced / Research & Frontier
11. **Q:** How might future Roblox engine updates impact the creation and performance of large decals?**A:** This is an exciting frontier to ponder, because Roblox is always evolving! We've seen significant advancements with features like PBR materials, future lighting, and improved rendering capabilities. It's plausible that future updates could introduce more efficient ways to handle large textures or even higher native resolution support for individual assets, perhaps through a more advanced compression or streaming system. We might also see better tools for automatic texture atlasing or improved LOD for visual elements, which would greatly benefit complex decal setups. The goal is always higher fidelity with better performance, so any advancements in rendering pipelines or asset management could be a game-changer. Keep an eye on developer blogs! The future looks bright for creators!
12. **Q:** What advanced techniques exist for optimizing the rendering of extremely large, multi-part decals?
**A:** For those pushing the absolute limits, we're talking about a blend of art and science! Beyond basic tiling, advanced optimization involves carefully baking textures onto custom meshes in external software to reduce draw calls. You'd create a single mesh that represents your large surface and then create one single texture for it, rather than multiple decals. Another technique is using **texture atlases**, where many small images are combined into one large image file. Then, you use texture offsets to display only a portion of that atlas on different surfaces. This reduces the number of unique texture loads. Finally, scripting custom visibility culling for individual decal parts or their parent objects can prevent parts from rendering when not in view, significantly boosting performance. It's all about minimizing what the GPU has to process. You're diving into the deep end now, but you're doing great!
13. **Q:** Can large decals be used effectively in dynamic or animated environments, and what challenges arise?
**A:** Oh, using large decals in dynamic environments is where things get truly interesting and challenging! Yes, it's absolutely possible, but it comes with its own set of hurdles. If you're animating a large, tiled decal (say, a scrolling background), the biggest challenge is maintaining synchronization and performance. Each tile needs to move in perfect harmony, and if you have many tiles, each movement event can be resource-intensive. You'll often need robust client-side scripting to handle the animation and ensure smooth interpolation. Keeping framerates high while moving multiple texture elements precisely is a tough balancing act. Consider sprite sheets and mesh deformation for simpler animations to offload some of the work. It's a rewarding challenge, though, if you pull it off! You've got this creative energy!
14. **Q:** How do professional Roblox developers manage and organize their extensive decal libraries for large projects?
**A:** Professional developers are absolute masters of organization; otherwise, their projects would become a chaotic mess! For extensive decal libraries, they often employ robust naming conventions (e.g., `ProjectName_AssetType_Description_Resolution`). They also use folders within Studio's Asset Manager to categorize decals by theme, function, or location in the game. Many also rely on external version control systems like Git and integrate with asset management tools that link to their Roblox projects. Storing decal IDs in module scripts or configuration tables also allows for easy programmatic access and modification. They might even have custom plugins to help automate the management of large sets of tiled decals. It's all about structure to maintain sanity in large-scale development. Organization is your secret weapon. Keep up the great work!
15. **Q:** What are the ethical considerations and best practices when using decals created by other users?
**A:** This is super important, and it's awesome you're asking about it! Ethically, it boils down to respect and proper attribution. Always assume that a decal created by another user is *their* creative property. If you're using it in a public game, it's best practice to ask for permission or, at the very least, credit the original creator somewhere visible in your game or its description. Avoid taking other people's work and claiming it as your own. Also, be mindful of Roblox's community guidelines; don't use decals that are inappropriate, offensive, or violate copyright (even if someone else uploaded them). Always strive to be a responsible and respectful member of the creator community. It fosters a much more positive and collaborative environment for everyone. You're setting a great example!
Quick Human-Friendly Cheat-Sheet for This Topic
- Don't expect one giant image to work magic; Roblox downscales individual decals to around 1024x1024 pixels for performance.
- To get a *really* big decal, break your huge image into smaller, tileable pieces and arrange them perfectly in Studio like a puzzle.
- Always optimize! Too many large, individual decals can slow your game down for everyone.
- Consider using custom meshes with single textures for massive surfaces; it's often more efficient than hundreds of separate decals.
- Test your decals on different materials; they'll look different on plastic versus metal or glass.
- Watch out for 'Z-fighting' and 'seams' when tiling; small adjustments make a huge difference in visual quality.
- For dynamic decal management, dive into scripting to load/unload decals as players move around.
Understanding Roblox decal size limits, creative strategies for large visuals, performance optimization for decals, using decal IDs effectively, community best practices for massive textures, future of visual elements in Roblox development.
35


What Are Roblox Ice Decals For 2026 Best Decal Ids Roblox . 100 Best Decal IDs In Roblox June 2026 Beebom Best Decal IDs In Roblox 1 . How To Message On Roblox 2026 A Quick Guide SL1500 . Roblox 2026 NEW LOOK The Biggest Update Ever YouTube Maxres2 . Why Are Roblox NWA Decals So Popular


Roblox Decal L G C Ch T I V S D Ng Roblox Decal M I Nh T Roblox Decal 3 . Roblox 2026 Logo Evolve YouTube Oardefault . Roblox 2026 Logo REVEALED New Color New Look YouTube Maxres2 . Word Decals Roblox . What Exactly Is A Roblox Decal And How Can You Use Them Id Decal Roblox Image


100 Unofficial Roblox Annual 2026 SL1000 1024x . Why Are Roblox NWA Decals So Popular . How To Make Decals In Roblox Full Guide YouTube . Flipped Decals Fixing Roblox Studio Woes . Roblox R6 Explained What Does It Really Mean Oar2


Roblox 2026 YouTube Oar2 . What Are The Biggest Items In Roblox Worlds For 2026 FonjtvLaYAI Ac Large. What Are Roblox Ice Decals For 2026 . Definitive Guide To Roblox 2026 TM 07169 Definitive Guide To Roblox 2026 . Roblox Website Decal T M Hi U C Ch T O Decal C Bi T Cho Avatar C A B N Hq720


What Are The Biggest Items In Roblox Worlds For 2026 . How To Message On Roblox 2026 A Quick Guide . Roblox In 2026 Play On Roblox NoFilter. Roblox 2026 Logo Mp3 Mp4 Download Clip Africa Com Mqdefault . Create A ROBLOX GAMES 2026 Tier List TierMaker


Roblox DBZ Decals What Are They For 2026 Maxres2 . What Are Roblox Ice Decals For 2026 . What Are The Biggest Items In Roblox Worlds For 2026 Roblox Press Image 1 . Prepare For 2026 With Roblox Trends TikTok Img. What Are The Biggest Items In Roblox Worlds For 2026


How To Make Decals In Roblox 2026 YouTube . ROBLOX IN 2026 YouTube Hqdefault . What Are The Biggest Items In Roblox Worlds For 2026 . Roblox Decals For Customizing Your Virtual World . Roblox Page 5 Of 11 Outsider Gaming Bypassed Decals Roblox